CentOS5.4にHadoopをインストールします。
1. JDKをインストールします。
# chmod +x jdk-6u23-linux-x64-rpm.bin
# sh jdk-6u23-linux-x64-rpm.bin
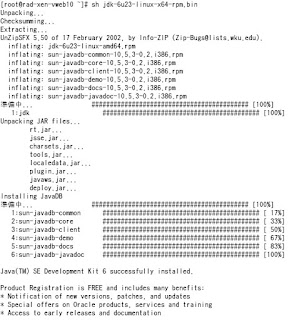
パスも自動的に設定されているようです。
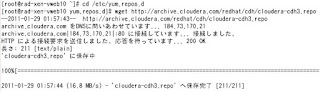
2. Cloudera社リポジトリの追加
# cd /etc/yum.repos.d
# wget http://archive.cloudera.com/redhat/cdh/cloudera-cdh3.repo
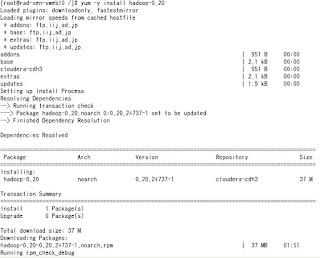
3. hadoopインストール

# yum -y install hadoop-0.20
4. サービス起動
# service hadoop-0.20-namenode start
# service hadoop-0.20-jobtracker start
# service hadoop-0.20-datanode start
# service hadoop-0.20-tasktracker start
Hadoopは「JobTracker」「TaskTracker」「NameNode」「DataNode」という4つのサーバから構成されます。 JobTrackerとTaskTrackerはMapReduce処理、NameNodeとDataNodeは分散ファイルシステム機能を担当しています。また、Hadoopを動かすクラスタでは1台が「masterノード」、その他のノードが「slaveノード」となります。 masterノードではJobTrackerとNameNode、slaveノードではTaskTrackerとDataNodeが起動されます
参考:
http://codezine.jp/article/detail/26995. 設定ファイルをインストール
# yum -y install hadoop-0.20-conf-pseudo
6. サンプルを見てみる
# hadoop-0.20 jar /usr/lib/hadoop-0.20/hadoop-*-examples.jar
とするとサンプル一覧が表示される
aggregatewordcount: An Aggregate based map/reduce program that counts the words in the input files.
aggregatewordhist: An Aggregate based map/reduce program that computes the histogram of the words in the input files.
dbcount: An example job that count the pageview counts from a database.
grep: A map/reduce program that counts the matches of a regex in the input.
join: A job that effects a join over sorted, equally partitioned datasets
multifilewc: A job that counts words from several files.
pentomino: A map/reduce tile laying program to find solutions to pentomino problems.
pi: A map/reduce program that estimates Pi using monte-carlo method.
randomtextwriter: A map/reduce program that writes 10GB of random textual data per node.
randomwriter: A map/reduce program that writes 10GB of random data per node.
secondarysort: An example defining a secondary sort to the reduce.
sleep: A job that sleeps at each map and reduce task.
sort: A map/reduce program that sorts the data written by the random writer.
sudoku: A sudoku solver.
teragen: Generate data for the terasort
terasort: Run the terasort
teravalidate: Checking results of terasort
wordcount: A map/reduce program that counts the words in the input files.
実行方法
# hadoop-0.20 jar /usr/lib/hadoop-0.20/hadoop-*-examples.jar サンプル名 引数1 引数2 ・・・
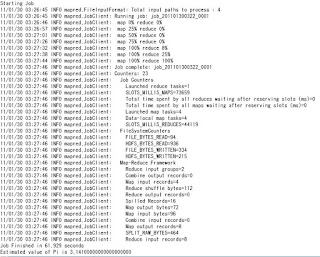
5.1 pi (円周率計算)をしてみる
# hadoop-0.20 jar /usr/lib/hadoop-0.20/hadoop-*-examples.jar pi 4(Number of Maps) 2000(Samples per Map)
Number of Maps = 4
Samples per Map = 2000
5.2 wordcountを実行する
5.2-1 処理対象を配置する先となる input サブディレクトリーをファイルシステムに作成
# hadoop-0.20 fs -mkdir input
5.2-2 input サブディレクトリーに処理対象を配置
# hadoop-0.20 fs -put /root/test.txt input
ここでは /root/test.txt をinputに移します。test.txtには英文を適当にいれておきます。
# hadoop-0.20 fs -ls input (ファイルがあるか確認します)
Found 1 items
-rw-r--r-- 1 root supergroup 73 2011-01-30 03:59 /user/root/input/test.txt
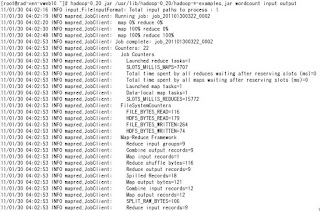
5.2-3 実行
# hadoop-0.20 jar /usr/lib/hadoop-0.20/hadoop-*-examples.jar wordcount input output
(この時点ではoutputはありません。自動生成されます)
5.2-4 結果確認
#

hadoop-0.20 fs -ls output (ファイルが作成されたか確認)

# hadoop-0.20 fs -cat output/part-r-00000 (結果確認)

# hadoop-0.20 fs -get output/part-r-00000 /root/output.txt (HDFS からの出力の抽出)
6. ブラウザ(Web UI)で確認
6.1 HDFSの確認
http://localhost:50070/
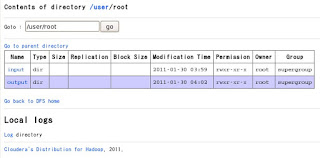
先ほど使ったファイルが見られます。
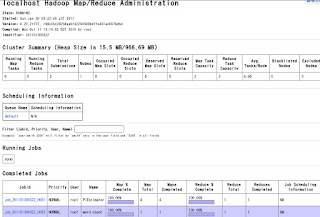
6.2 MapReduceの確認
http://localhost:50030/
参考
http://saburi380.blogspot.com/2009/11/301hadoopcentos-cloudera.htmlhttp://oss.infoscience.co.jp/hadoop/common/docs/current/quickstart.html#Purposehttp://www.ibm.com/developerworks/jp/linux/library/l-hadoop-1/index.html?ca=drs-http://www.ibm.com/developerworks/jp/linux/library/l-hadoop-2/


